ShopDreamUp AI ArtDreamUp
Deviation Actions
Literature Text
B-Movie Style Poster Part I
By Karlika
BEFORE WE BEGIN: RESOURCES! All of these will be linked in my Artist's Comments, so please, go look. If you're following along to the T, then you'll need to get the Following:
-Your Image (The one I provide, your own, stock, whatever.)
-A Grunge or Distressed Paper Texture (These are optional. But if you want it be just flat, just don't use these.)
-Some Horror Fonts. My Favorites to use are:
'Feast of Flesh' by Blambot Foundry
'Mars Attacks!' By Film Font
'Evil of Frankenstein' by Brain Eaters Font Company
All of these are free to download and use. However, if you happen be lucky to have Die Typonauten's B-Movie Retro set, or the money to buy it, then by all means, use them! If your using your own stock image/photograph, please, please PLEASE make sure it's over 500 pixels and 300 DPI. Otherwise you're going to get pixelization like crazy. Or if you must use a Web Resolution (72 DPI), please make sure to replace the '300' with a '72' (or whatever resolution you're working with) through this tutorial.
2- And now to the image! If you are using your own, you may have to adjust accordingly. And if you have black and white image already with perfect levels, then skip the next paragraph.
If you downloaded the one I provided, excellent. Open it up, unlock it by clicking on the lock on the side of the layer, and then finally making a copy of the layer with Cntrl/Command+J. Hide the original layer, and Desaturate the copy with Cntrl/Command+Shift+U. Select the Magic Wand Tool and set your Tolerance to 12. Invert your selection with a Cntrl/Command+Shift+I and make a copy. Give it a Gaussian Blur of 1.5, then go to Levels (Image > Adjustments > Levels or Cntrl/Command+L) and put in 43 0.83 200.
Make a copy of your image (Cntrl/Command+J) and hide it away or move it to the bottom. (You never know when you're going to mess up or want to experiment!) Then go to Filter > Artistic > Poster Edges with the following:
Edge Thickness- 10
Edge Intensity- 0
Posterization- 6
We're going to blur it and play with the levels again. So give it another Gaussian Blur at 3.5, then got back to Levels and set it to 42 0.68 200. Again, if you're using another image that may be a different size or resolution, you may want to toy around with everything.
Move it into your "poster" file under you 'border' layer. Turn it into a Smart object by Right-Click/Cntrl-Click and hit 'Convert to Smart Object'. Make it as big or small as you wish. Copy it, then make the top copy's Layer Mode to Multiply, and the lower copy to Screen and set its opacity to 50%. If you downloaded the resource ZIP file, please read on, if not, skip to the next part.
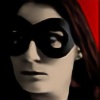
Open up ScreamingWoman.jpg. Give her a 3.5 Gaussian Blur, run the Poster Edge filter with the same settings as before (If you haven't played around with it in between then and now, it should automatically have those setting in.) And finally, give her another Gaussian blur a 2 pixels, bring her into the poster, and make it a Smart Object and resize.
(Don't worry about the background not being removed. I'll get to that in the next step.)
3- Time to add the color! Select your gradient tool and your two colors. My colors are #000000 and #501010 and I'm using a Radial Gradient and putting the red behind the Skull. However, you may use a linear if you wish. Make a new layer and put the gradient in, you may need to move or transform (Cntrl/Command+T) it to get it just right. I had to for the radial. Finally, set it to Multiply.
**(If you're using the woman): Set the woman (which should be a smart object)'s layer to Multiply. This part is the most time-consuming part to do. Add a new group and call it 'Color'. There are two ways to tackle it: Painting using the brush tool, or using the pen tool to make areas of fill, add a Gaussian blur, then erase the excess. For the sake of making it easy, make each color its own layer. If you go for the first idea and have a tablet, like myself, it'll be much easier. If you use the mouse, more power to you. Keep it simple- use flat colors; add a bit of lip color and eye color to her if you want. When you're finished, set the group's Layer to Screen. Move that group (and the image) above the skull layer. I felt our lady needed a shadow behind her, so I make a new layer, moved it underneath the skull, and paint black behind her with a the Fuzzy 200px brush.
--------------------------------------------------------------------------------
PART II
1- Open up a new document at 8.5x11 inches @ 300 DPI/RGB Mode. Set your two colors to #fffdea and #000000. Fill the layer with color #fffdea. Make a new layer, and then select the Rectangular Marquee Tool. Set it to 'Fixed Size' an make the size 8 x 10.5 inches, and fill it with black and center it. Save this for later, this will become our halftone pattern.
Select the Magic Wand tool, and select the space outside the black square. Click on the bottom layer while the marquee is still on and hit Cntrl+J on a PC or Command+J for a Mac. (Or alternatively, Make another new layer and click the open space on the black area, and fill it with the color we used before (#fffdea) on the new layer). Set this at the top of whatever you do from now on, this will be your border.
4-Now on to the effects! Reset your palette to default by hitting 'D'. Remember that black rectangle ? Bring that back up just below the 'border' layer. Invert it with a Cntrl/Command+I Once white, Go to Filter > Sketch > Halftone Pattern and put in:
Size- 4
Contrast 0
Pattern- Dot
Once rendered, set the layer to Multiply and it Opacity down to about the 10-20% area. I set mine to 20%.
After that, time to make it look distressed and more…old poster-y. Open up your texture and bring it in OVER your 'border' layer. If it's too small, make it a Smart Object and resize it. Play around with the Layer Modes and opacity to get it to however you like. If you're following a long with me directly, take the paper texture image I linked and bring it in. Make it a Smart Object, resize to your will, and make a copy. Set the bottom one to Normal with a 5% Opacity, and set the top one to Multiply with its Opacity at 60%. Copy the top layer again, Invert it (Cntrl/Command+I) then Desaturate it (Cntrl+Command U), and Invert it again. Keep the Layer Mode to Multiply, but set Opacity to 35%.
5- Finally, the Text! This will go above you image, but below your texture and border. To insure this happens, make three new Groups, label the top one 'Effects', and then put all the paper textures, halftone, and border layers in it. Label the one below that 'Text' and leave it alone for the moment. The one below that, the bottom group, label it 'Image, and put your color, background gradient, and image all in there.
Find a font that fits. The ones I listed before are all excellent B-Movie Style typefaces. I will be using Blambot's 'Feast of Flesh' and HPLS Headline Two (links will be provided in the comments.) Give it a catchy headline and cheesy title (I'm going with 'The Sinister Skull') And add some other elements like the actor's names and the Director, Producer, and Screenwriter, and all that fun stuff. If you don't have your Characters palette out, do so in Windows > Characters. It will help when altering type.
*If you're following me, here is the layout. The type is Feast Of Flesh.
Tagline: 35 Points, no scaling.
Title: 80 Points, vertically scaled at 130%, then Warp Type with Horizontal Flag with a +31% bend. Then give it a Drop Shadow (Normal Blend Mode at 100% opacity, she the angle to 55, and the distance to 50.), and a Stroke. (Color is #460404, Size at 10 px, and set to the outside.)
The text just below it is HPLS Headling Two. With Small Caps (in your Character Palette.)
'A G. Hamilton Film': 18 points, with a vertical scale of 130%.
'Starring': 30 points with no scaling.
The Actors Names: 34 points with a 75% vertical scale
Bottom Bits: 30 points with s 20 point leading, scaled 75% vertically, and 90% horizontally.
…And you're done! Hooray!
By Karlika
BEFORE WE BEGIN: RESOURCES! All of these will be linked in my Artist's Comments, so please, go look. If you're following along to the T, then you'll need to get the Following:
-Your Image (The one I provide, your own, stock, whatever.)
-A Grunge or Distressed Paper Texture (These are optional. But if you want it be just flat, just don't use these.)
-Some Horror Fonts. My Favorites to use are:
'Feast of Flesh' by Blambot Foundry
'Mars Attacks!' By Film Font
'Evil of Frankenstein' by Brain Eaters Font Company
All of these are free to download and use. However, if you happen be lucky to have Die Typonauten's B-Movie Retro set, or the money to buy it, then by all means, use them! If your using your own stock image/photograph, please, please PLEASE make sure it's over 500 pixels and 300 DPI. Otherwise you're going to get pixelization like crazy. Or if you must use a Web Resolution (72 DPI), please make sure to replace the '300' with a '72' (or whatever resolution you're working with) through this tutorial.
2- And now to the image! If you are using your own, you may have to adjust accordingly. And if you have black and white image already with perfect levels, then skip the next paragraph.
If you downloaded the one I provided, excellent. Open it up, unlock it by clicking on the lock on the side of the layer, and then finally making a copy of the layer with Cntrl/Command+J. Hide the original layer, and Desaturate the copy with Cntrl/Command+Shift+U. Select the Magic Wand Tool and set your Tolerance to 12. Invert your selection with a Cntrl/Command+Shift+I and make a copy. Give it a Gaussian Blur of 1.5, then go to Levels (Image > Adjustments > Levels or Cntrl/Command+L) and put in 43 0.83 200.
Make a copy of your image (Cntrl/Command+J) and hide it away or move it to the bottom. (You never know when you're going to mess up or want to experiment!) Then go to Filter > Artistic > Poster Edges with the following:
Edge Thickness- 10
Edge Intensity- 0
Posterization- 6
We're going to blur it and play with the levels again. So give it another Gaussian Blur at 3.5, then got back to Levels and set it to 42 0.68 200. Again, if you're using another image that may be a different size or resolution, you may want to toy around with everything.
Move it into your "poster" file under you 'border' layer. Turn it into a Smart object by Right-Click/Cntrl-Click and hit 'Convert to Smart Object'. Make it as big or small as you wish. Copy it, then make the top copy's Layer Mode to Multiply, and the lower copy to Screen and set its opacity to 50%. If you downloaded the resource ZIP file, please read on, if not, skip to the next part.
Open up ScreamingWoman.jpg. Give her a 3.5 Gaussian Blur, run the Poster Edge filter with the same settings as before (If you haven't played around with it in between then and now, it should automatically have those setting in.) And finally, give her another Gaussian blur a 2 pixels, bring her into the poster, and make it a Smart Object and resize.
(Don't worry about the background not being removed. I'll get to that in the next step.)
3- Time to add the color! Select your gradient tool and your two colors. My colors are #000000 and #501010 and I'm using a Radial Gradient and putting the red behind the Skull. However, you may use a linear if you wish. Make a new layer and put the gradient in, you may need to move or transform (Cntrl/Command+T) it to get it just right. I had to for the radial. Finally, set it to Multiply.
**(If you're using the woman): Set the woman (which should be a smart object)'s layer to Multiply. This part is the most time-consuming part to do. Add a new group and call it 'Color'. There are two ways to tackle it: Painting using the brush tool, or using the pen tool to make areas of fill, add a Gaussian blur, then erase the excess. For the sake of making it easy, make each color its own layer. If you go for the first idea and have a tablet, like myself, it'll be much easier. If you use the mouse, more power to you. Keep it simple- use flat colors; add a bit of lip color and eye color to her if you want. When you're finished, set the group's Layer to Screen. Move that group (and the image) above the skull layer. I felt our lady needed a shadow behind her, so I make a new layer, moved it underneath the skull, and paint black behind her with a the Fuzzy 200px brush.
--------------------------------------------------------------------------------
PART II
1- Open up a new document at 8.5x11 inches @ 300 DPI/RGB Mode. Set your two colors to #fffdea and #000000. Fill the layer with color #fffdea. Make a new layer, and then select the Rectangular Marquee Tool. Set it to 'Fixed Size' an make the size 8 x 10.5 inches, and fill it with black and center it. Save this for later, this will become our halftone pattern.
Select the Magic Wand tool, and select the space outside the black square. Click on the bottom layer while the marquee is still on and hit Cntrl+J on a PC or Command+J for a Mac. (Or alternatively, Make another new layer and click the open space on the black area, and fill it with the color we used before (#fffdea) on the new layer). Set this at the top of whatever you do from now on, this will be your border.
4-Now on to the effects! Reset your palette to default by hitting 'D'. Remember that black rectangle ? Bring that back up just below the 'border' layer. Invert it with a Cntrl/Command+I Once white, Go to Filter > Sketch > Halftone Pattern and put in:
Size- 4
Contrast 0
Pattern- Dot
Once rendered, set the layer to Multiply and it Opacity down to about the 10-20% area. I set mine to 20%.
After that, time to make it look distressed and more…old poster-y. Open up your texture and bring it in OVER your 'border' layer. If it's too small, make it a Smart Object and resize it. Play around with the Layer Modes and opacity to get it to however you like. If you're following a long with me directly, take the paper texture image I linked and bring it in. Make it a Smart Object, resize to your will, and make a copy. Set the bottom one to Normal with a 5% Opacity, and set the top one to Multiply with its Opacity at 60%. Copy the top layer again, Invert it (Cntrl/Command+I) then Desaturate it (Cntrl+Command U), and Invert it again. Keep the Layer Mode to Multiply, but set Opacity to 35%.
5- Finally, the Text! This will go above you image, but below your texture and border. To insure this happens, make three new Groups, label the top one 'Effects', and then put all the paper textures, halftone, and border layers in it. Label the one below that 'Text' and leave it alone for the moment. The one below that, the bottom group, label it 'Image, and put your color, background gradient, and image all in there.
Find a font that fits. The ones I listed before are all excellent B-Movie Style typefaces. I will be using Blambot's 'Feast of Flesh' and HPLS Headline Two (links will be provided in the comments.) Give it a catchy headline and cheesy title (I'm going with 'The Sinister Skull') And add some other elements like the actor's names and the Director, Producer, and Screenwriter, and all that fun stuff. If you don't have your Characters palette out, do so in Windows > Characters. It will help when altering type.
*If you're following me, here is the layout. The type is Feast Of Flesh.
Tagline: 35 Points, no scaling.
Title: 80 Points, vertically scaled at 130%, then Warp Type with Horizontal Flag with a +31% bend. Then give it a Drop Shadow (Normal Blend Mode at 100% opacity, she the angle to 55, and the distance to 50.), and a Stroke. (Color is #460404, Size at 10 px, and set to the outside.)
The text just below it is HPLS Headling Two. With Small Caps (in your Character Palette.)
'A G. Hamilton Film': 18 points, with a vertical scale of 130%.
'Starring': 30 points with no scaling.
The Actors Names: 34 points with a 75% vertical scale
Bottom Bits: 30 points with s 20 point leading, scaled 75% vertically, and 90% horizontally.
…And you're done! Hooray!


Well, some of you may remember the poster I made for TFI’s movie night, if not, the check it out here:
Someone asked me (I think it may have been ~RocketRonin or another student I’ve had class with, but I’m not sure) to write out a tutorial. So, here we are. Sorry that it’s just a text with no accompanying images, I just haven’t had the Oomph to make it. If I ever do, I’ll update it, that’s for sure. I just wanted to get this out of my hair on my projects list.
Images Used (For those who aren’t really that experimental):
Skull- [link]
Woman- [link]
Paper- [link]
(You need to make it portrait)
Or use this- [link]
Fonts Used:
Feast of Flesh- [link]
HPLHS Headlines- [link]
Fonts Suggested:
Freeware:
Mars Attacks!- [link]
Evil of Frankenstein- [link]
Buyable (And well worth it IMO):
B-Movie Retro- [link]
Someone asked me (I think it may have been ~RocketRonin or another student I’ve had class with, but I’m not sure) to write out a tutorial. So, here we are. Sorry that it’s just a text with no accompanying images, I just haven’t had the Oomph to make it. If I ever do, I’ll update it, that’s for sure. I just wanted to get this out of my hair on my projects list.
Images Used (For those who aren’t really that experimental):
Skull- [link]
Woman- [link]
![[link]](https://www.deviantart.com/users/outgoing?http://i19.photobucket.com/albums/b170/Karly-Chan/ScreamingWoman.jpg)
Paper- [link]
![[link]](https://www.deviantart.com/users/outgoing?http://chillipaprika.com/wp-content/uploads/2010/12/old_paper.jpg)
(You need to make it portrait)
Or use this- [link]
![[link]](https://www.deviantart.com/users/outgoing?http://multimedia502.com/poster/old_paper.jpg)
Fonts Used:
Feast of Flesh- [link]
HPLHS Headlines- [link]
Fonts Suggested:
Freeware:
Mars Attacks!- [link]
Evil of Frankenstein- [link]
Buyable (And well worth it IMO):
B-Movie Retro- [link]
© 2011 - 2024 Karlika
Comments3
Join the community to add your comment. Already a deviant? Log In
Very useful!
